

Last Updated on October 3, 2023
Disclosure: This post may contain affiliate and/or referral links which means I may receive a commission if you purchase something recommended within this article. It will be of no extra cost to you. As always, thank you for supporting The Rocky Safari.
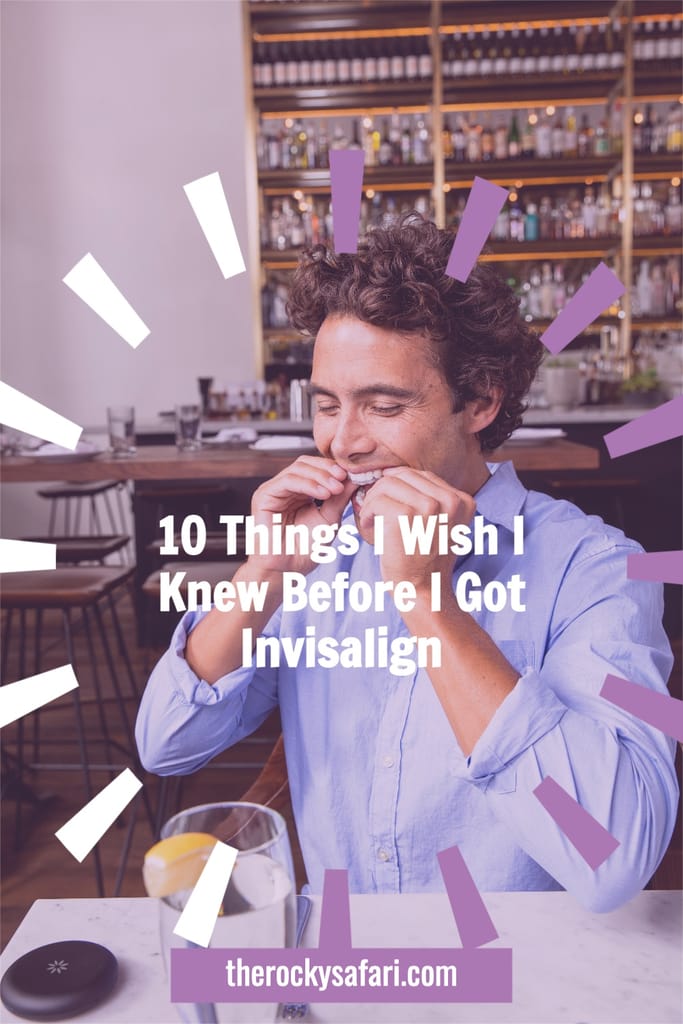
Invisalign is portrayed as an easy alternative to traditional braces, but the reality of the orthodontic treatment process may surprise you in more ways than one!
Let’s discuss 10 things I learned from my first 3 months with Invisalign.
A Glimpse Into My Invisalign Story
When I visited my orthodontist 3 months ago, I found out that I needed to choose between getting braces or having jaw surgery. (Read More.)

With a decision like that to make, especially after already having had metal braces back when I was in high school, choosing to go through re-treatment with clear Invisalign braces this time seemed like the lesser of two (..3?) evils.
(Let’s say 2 evils because metal braces were out of the question.)
3 Months Into Invisalign Treatment
Now that I have had Invisalign braces for 3 months, I’ve pretty much completely settled into the routine of wearing them.
I’m currently wearing Invisalign aligner number 10 out of 38. In other words, I’m about a quarter of the way done!
I’ve already learned A LOT of tips during this time so I want to share! In this post, I’ll share every little tip and pointer I wish I had known right from Day 1.
Invisalign braces are presented as a simple, discreet alternative to traditional metal braces, but what you may not realize is that your treatment may not be as seamless as you may have hoped.
10 Things I Wish I Knew About Invisalign
Disclaimer: I am an Invisalign patient, not a medical doctor. I am sharing my personal experience in this post. Please do not mistake this for professional medical advice.
Table of Contents
1. Your Teeth May Require Attachments!
For some reason, I always thought Invisalign just meant wearing clear retainers.
I had this idea that if I took off my retainers, I thought my mouth would look completely back to normal. Free of any sign of braces.
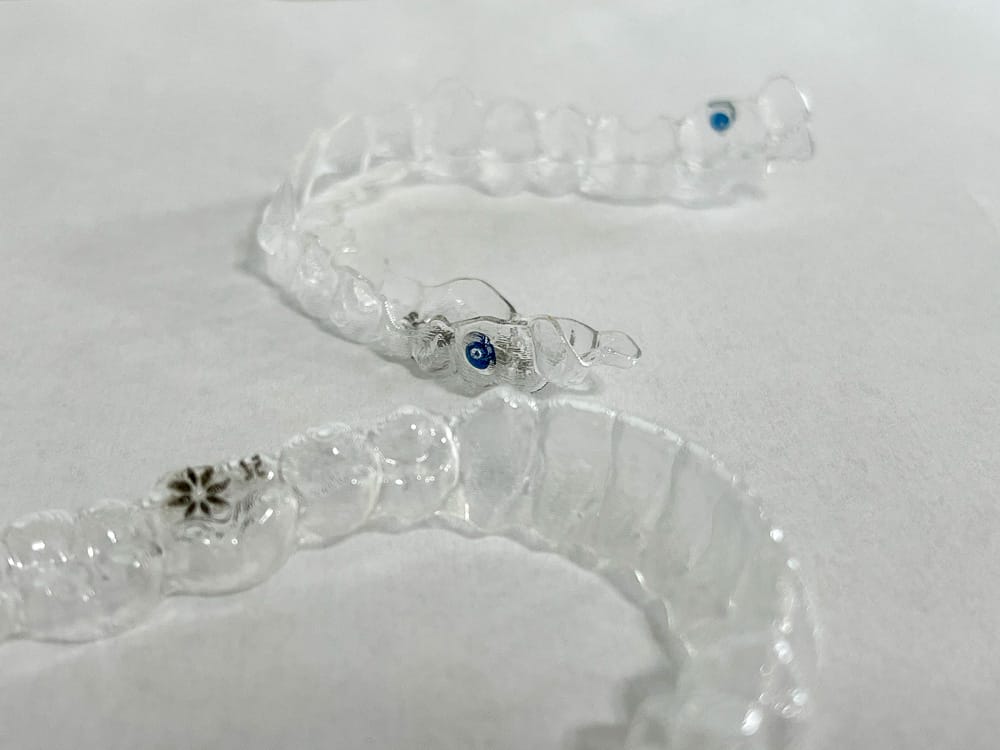
Sadly, at least for me, that was not the case at all. My teeth required 21 Invisalign attachments, commonly referred to as, “buttons.”
These buttons are enamel-colored bumps that get bonded to your teeth. They remove them once your aligner treatment is finished, but the expectation is that you’ll have the buttons on your teeth until the refinement period is finished.
You May or May Not Need Buttons
Fortunately, not everyone requires them! For those who DO, the amount needed varies from one person to another. My orthodontist explained to me that Invisalign trays can only push teeth around left, right, forward, and back. If your teeth require anything up, down, or any very complex movements, adding a button to press on helps accomplish those shifts.
If you use one of those cheaper online websites like “Smile Direct Club”… maybe trays ARE all you’ll get for your smile. However, I don’t see skipping the attachments as an advantage if obtaining a proper “perfect bite” is also a primary objective.
Rubber Bands Are Still a Thing!
To add to my last point, remember rubber bands? The bane of my existence from when I had metal braces. Yeah, even those can still be added to Invisalign.
Lucky me. After my 8th tray, I went in for a check-up and they added rubber bands to my daily regimen.
Sorry… terrible photo of me, but this is what they look like:
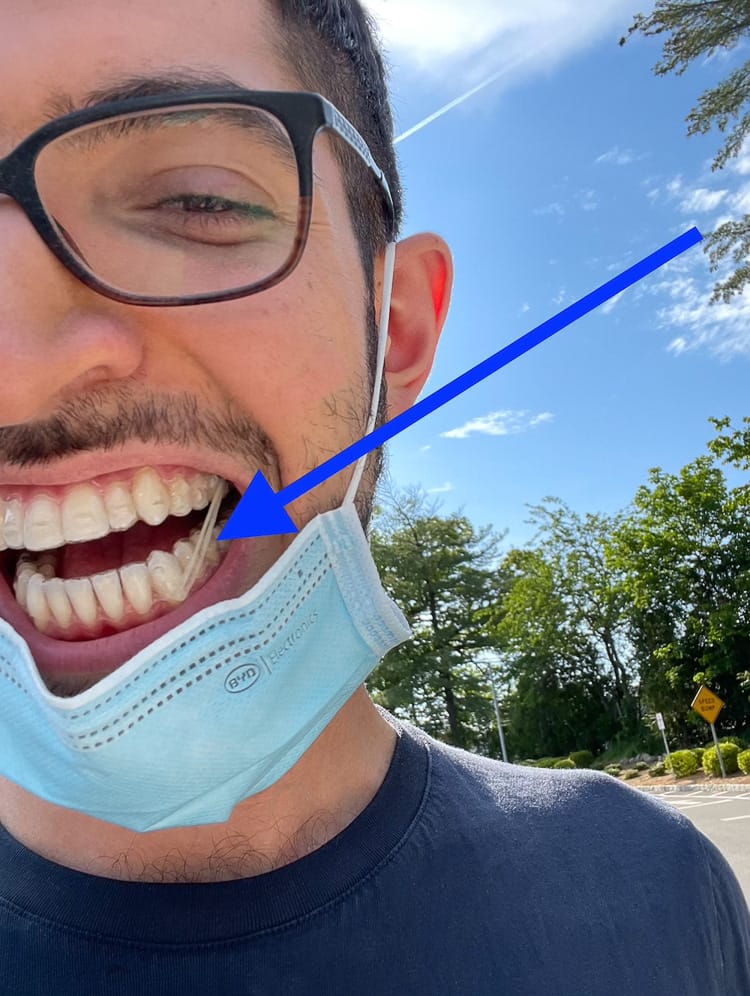
There are special rubber band attachments that get bonded to the base of certain teeth so that you are able to stretch a rubber band across your mouth.
The front one is clear to make it more “invisible.” The one in the back is metal. Both hooks remain attached to your teeth even when you remove the trays. They’re bonded just above/below the aligners.
I find the one at the front a little uncomfortable against my lip, but you sort of adjust to the rubbing as you would with metal braces.
2. Swap Out Your Trays at NIGHT!
When you get Invisalign, your orthodontist will print out a chart that tells you exactly which days to change your trays. If it tells you to change to a new tray this coming Monday, swap the new one in on Sunday NIGHT!
Do NOT change them in the morning!
In my experience, the discomfort becomes the most intense the first few hours after changing to a new tray. If you switch them at night, you can sleep it off!
Many people manage their pain and soreness with pain relievers.
Only Acetaminophen with Invisalign
You absolutely cannot take any NSAIDs while correcting your smile. These include Advil, Motrin, and Aleve.
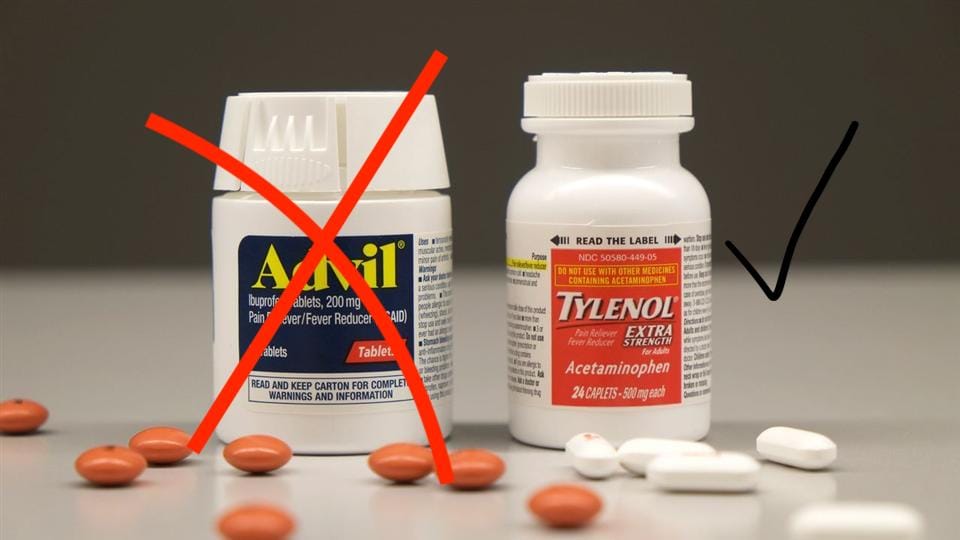
I’ve never felt the need to take anything, but if the pain becomes bad enough for you, they say it’s safe to take Tylenol to reduce the pain.
(Studies have shown NSAID drugs hinder the chemical reactions that are necessary during the process of applying pressure to teeth with Invisalign.)
Switching Sort of Tickles
Honestly, in my experience, the pain has been minimal. Each tray has such a small alteration that the soreness is almost negligible. The pain from adding rubber bands to pull my lower teeth back has been 100x more painful than the tray-based tooth movements.
Sometimes when I push the new tray on, it actually makes me laugh… It tickles my bottom front teeth in a very unexpected way.
3. Invisalign Must Be Worn for 22+ Hours
At first, I was seriously stressing over this rule. (It’s actually really important you follow this guideline. As crazy as it may seem, if your trays aren’t on for at least 22 hours per day, the necessary shifts may not happen on schedule.
They Have a Built-In Wear Detector
Each upper Invisalign tray has two blue dots printed onto the back molars. Wearing your aligner for the full specified time all week is the only way to fade the blue ink off to the point where it becomes clear.
This is how your orthodontist will know if you’re really complying with their treatment plan or not.
My Routine
In effect, you basically have to wear your trays all day every day with the exception of when you are eating.
In general, this is how I allocate my time each day:
- 30 minutes for breakfast
- 30 minutes for lunch
- 45 minutes for dinner
- 15 minutes for tea
4. Track Your Progress With TrayMinder
One of the best things I’ve done is download the TrayMinder iPhone app.
This app has a ton of features for Invisalign users. You can time how long the trays are in, how long they’re out, and set reminders so you don’t forget!
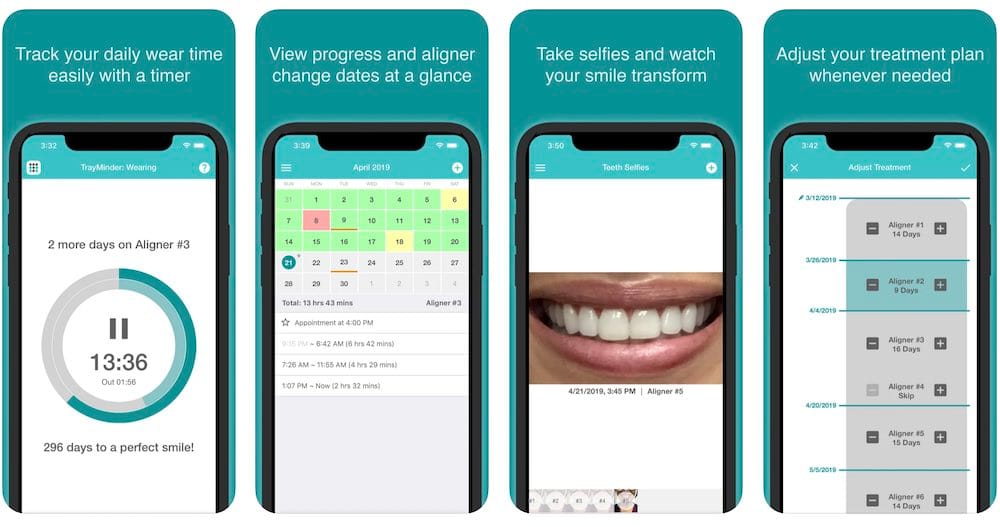
Everyone’s schedule is a bit different. Some people change their trays every 5 days, 7 days, 10 days, or 14 days. You can program the app calendar and it will remind you when it’s time to progress onto the next one!
Take Progress Selfies
My favorite TrayMinder feature is that you can take photos of your teeth each week (or as often as you wish) and track your progress!
5. Kissing Is Awkward
There’s nothing graceful about removing the trays.
If you have Invisalign buttons, the trays really hug those. You basically have to pull and pry at the plastic to pull it down tooth-by-tooth. You may find they really only slide off easily if you start from one side or the other.
You can hold up a napkin or try to be discreet, but there’s really nothing you can do that will make it any less awkward as you tug those trays off. You might prefer to turn away momentarily or briefly excuse yourself to visit the bathroom.
If you’re planning on having any romantic dates or hookups, it’s kind of… not fun having Invisalign to deal with.
The Lisp Isn’t All That Bad
A lot of people say Invithalign gives you a lisp. I’m not going to deny that experience since I’m sure for a lot of people, it does. Interestingly enough, I didn’t experience any lisp from it.
I questioned if it was because I’m already used to talking with my original plastic upper retainer from the past decade of wearing it each night. Maybe my tongue already knows how to speak and position itself with something plastic covering my teeth. I’m not sure.
6. Invisalign Stains Extremely Easily
Allow me to share how to create a rainbow of Invisalign stains:

- Red: Red Wine
- Orange: Carrot Juice
- Yellow: Orange Juice
- Green: Mint Polident Denture Cleaner. [DON’T USE IT.]
- Blue: Cool Mint Mouthwash
- Purple: Grape Juice
- Pink: Lipstick [According to a friend haha]
Don’t bother with Efferdent or Polident denture cleaner. It has the potential to stain your aligner… as it did with one of mine. Also, I didn’t find it particularly effective. Some reviewers even say the chemicals in it can be dangerous. I haven’t researched that.
They sell Invisalign whiteners if you want them. I feel like they’re a bit unnecessary because by the time mine start to look like they’d need it, I’m replacing them and moving onto the next anyhow.
7. Bye Bye to Coffee, Tea, & Anything Hot
I’m not a coffee drinker myself, but coffee is actually one of the most infamous ways to stain your Invisalign. Unless you want brown teeth, avoid it.

Tea is slightly less likely to stain, although I still would not risk it. However, these two types of drinks get a special mention on here… not for their ability to stain… but for their ability to WARP your retainers.
You can’t drink anything hot with Invisalign without the risk of warping them.
It is best to remove your trays, chug the drink (don’t burn yourself), then pop them back in after. I definitely miss my random cups of tea throughout the day.
Sipping With a Straw May Help
I haven’t tested this myself, but I’ve heard stories of people using straws for their lukewarm coffee to drink without staining or warping the trays. I think it almost sounds like more trouble than just removing them, but maybe that’s just me.
8. Reshaping Certain Teeth May Be Required
This caught me a bit off-guard on Day 1. My treatment required something called interproximal reduction (IPR for short). It’s a mildly terrifying procedure that takes all of 5 seconds to perform which permanently reshapes your teeth by shaving off a very small amount of your enamel off the sides of specific teeth.
The tool looks like a mini saw and it is kind of scary watching them shave down your teeth with this blade… At least, I thought so.
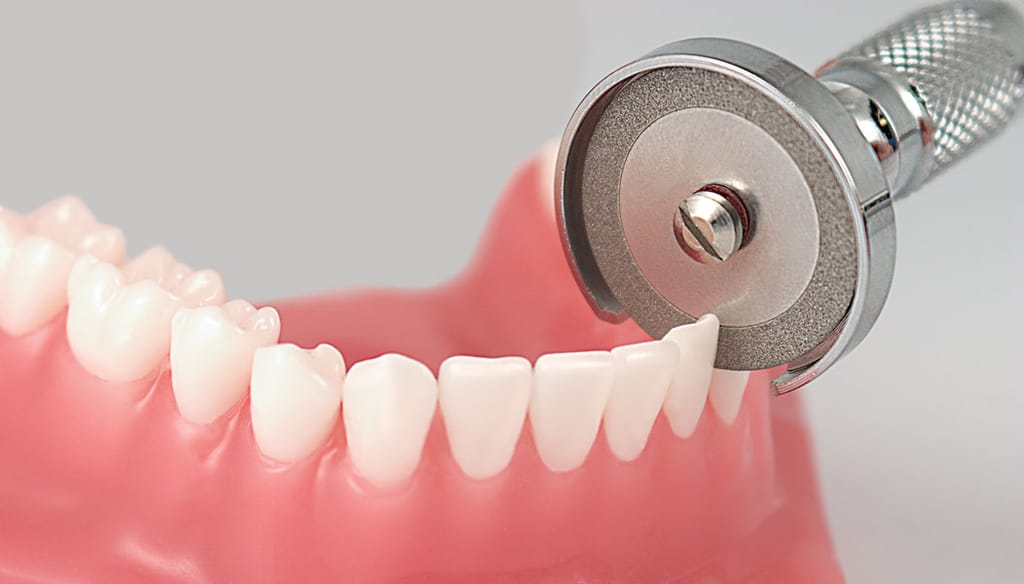
The gaps are not as noticeable as you might feel. When your treatment is over, you’ll be glad they did it. Besides, if they say you need it, it’s necessary. When teeth are touching one another, it’s difficult for them to move. By temporarily creating a space in between, new movements can occur.
IPR has been done for ages. It’s nothing new. They’re only supposed to take off a small amount of enamel (I believe it’s usually half of a millimeter.) Using the small space it makes, they are able to pull your teeth together, closing up any avoidable gaps at the bottom of the teeth and fixing your bite in the process.
Fun Fact
Each sequential new Invisalign tray is about 0.25 millimeters more “correct” than the one before it!
9. You Will Brush & Floss To Insanity
You HAVE TO brush your teeth after every single time you eat anything or drink anything (besides water.)
You also need to floss. These are the little dental flossers I use and I find them to be really convenient and easy to work with. Wearing Invisalign aligners makes you more prone to cavities so good hygiene is quite important.
Oh, and you should brush the trays too, but don’t use any toothpaste on them.
Buy an Ultrasonic Electric Toothbrush
My dentist recommended I purchase this toothbrush by Oral B and it has honestly *changed my life.* I definitely recommend it to anyone – with Invisalign or not!
I loveeee it.
The Weight Loss Thing Is a Joke
Many people say that you’ll lose weight on Invisalign. Mostly because the trouble of brushing afterward becomes so annoying that you avoid snacking and eat less.
In my experience, I don’t eat less. Instead, I experience longer gaps in between meals but when I finally do eat, I. GO. TO. TOWN.
Invisalign Isn’t Very Travel Friendly
One of my biggest takeaways is how thrilled I am to be going through this process now while I’m still minimizing my travels. I hate to say it, but Invisalign is a lot easier when you’re home.
Eating out with them while on the road and trying to stay on top of your hygiene seems like it would be difficult. My treatment included an aligner case but you’d probably also need to carry a travel toothbrush and case of floss with you if you’re out a lot.
I’m not even sure how you’d handle the orthodontist office checkups while traveling long-term because you’d likely need to schedule one every 6 to 8 weeks or so.
Try Movemints: Mints for Invisalign
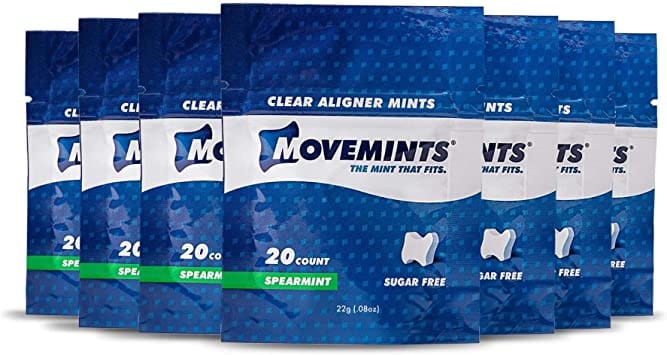
“Movemints” are great tasting, sugar-free mints that freshen breath, help dry mouth, and assist with seating Invisalign aligners and retainers. Get them on Amazon.
If you’re on-the-go a lot, maybe give these a try!
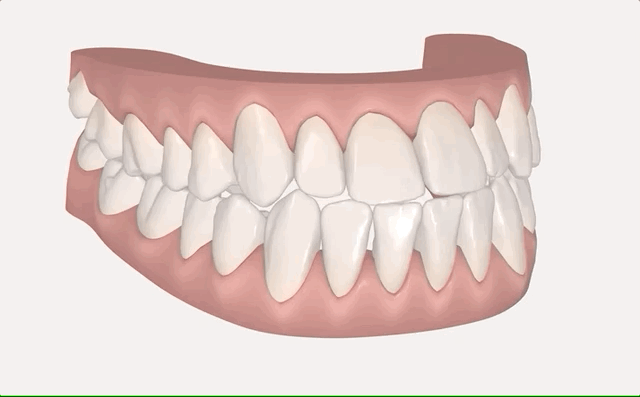
10. Invisalign Utilizes Fancy 3D Tech
I probably should have started with this, but I suppose I’ll wrap up with it instead.
Unlike traditional metal braces, the process of preparing for Invisalign involves a very high-tech process of scanning and 3D modeling your teeth.
The iTero Scanner
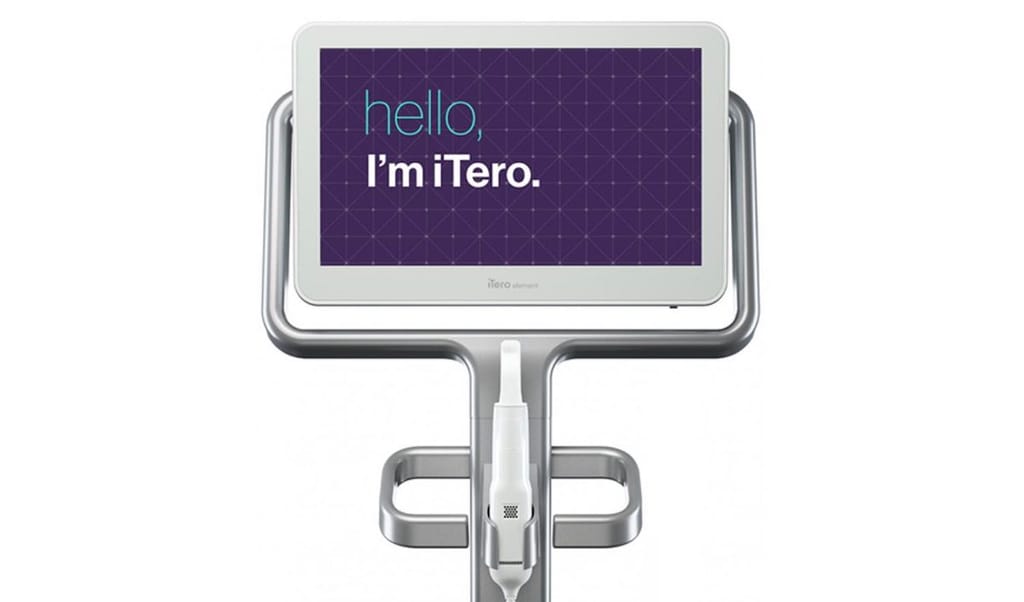
When I was preparing to get Invisalign, my orthodontist used an iTero scanner to create a 3D scan of my teeth in real-time which was later studied, engineered, and then forwarded to Invisalign’s factory in Mexico where they manufactured my trays.
I thought they’d have to do one of those gross-tasting impression molds, but it seems those are now a thing of the past.
The 3D Custom Treatment Plan
I received a custom-made 3D model online showing the way my teeth will change throughout the entire process. I thought it was pretty interesting to watch. It helps motivate you to see the progress you’re making with each sequential tray that you put on.
Invisalign Wrap-Up
I hope you found this post helpful if you’re thinking about getting Invisalign braces!
If you couldn’t tell, aligners really are a commitment. Still, I think they’re well worth the trouble and cost.
If you thought this article was interesting, please share it with others and pass it along to anyone you know who might be thinking about going through this process for themselves. You never know who it might help.
Thank you for reading!
Very helpful since I am pretty sure I will be going through this a little later this year. I am glad I read this!
Thanks! I’m glad you found it helpful! 🙂
I really loved your post! Great content on Invisalign.
I’m glad! I hope it helped!